Most homeowners who haven't renovated before are working from the same mental model: weeks of disruption, workers coming and going on an unpredictable schedule, the bathroom unusable for an extended period, and a final cost that somehow exceeded the estimate.
This article exists to replace that imagined scenario with what actually happens, phase by phase, from your first call to the moment you step into your new shower.
Phase 1
The Free Consultation
60-90 minutes
Phase 2
Design and Material Selection
1-2 weeks
Phase 3
Installation Day
1 day
Phase 4
The First 24 Hours
Post-installation
1Phase 1: The Free Consultation
The process begins with an in-home consultation: not a sales call, but a genuine assessment of your bathroom and your goals. Here's what happens during those 60 to 90 minutes:
What We Assess
- Current bathroom layout, condition, and infrastructure
- Existing surround (tile, tub, or enclosure)
- Ventilation and plumbing access points
- Anything visible that might affect the installation
Seattle-Specific Note
This assessment often includes a frank conversation about ventilation, because inadequate exhaust is one of the primary drivers of the moisture damage and mold that our teams find behind walls in a significant percentage of King County bathrooms.
What You Should Bring to This Conversation
- A sense of your priorities: durability, accessibility, aesthetics, budget
- Any photos of bathrooms you admire
- Questions about the process and timeline
- Honest information about your timeline, especially if you're planning to sell
What You Leave With
A written quote covering the scope of work, materials, timeline, and total cost. No obligation. No pressure to decide on the spot. The quote is fixed, not an estimate that grows.
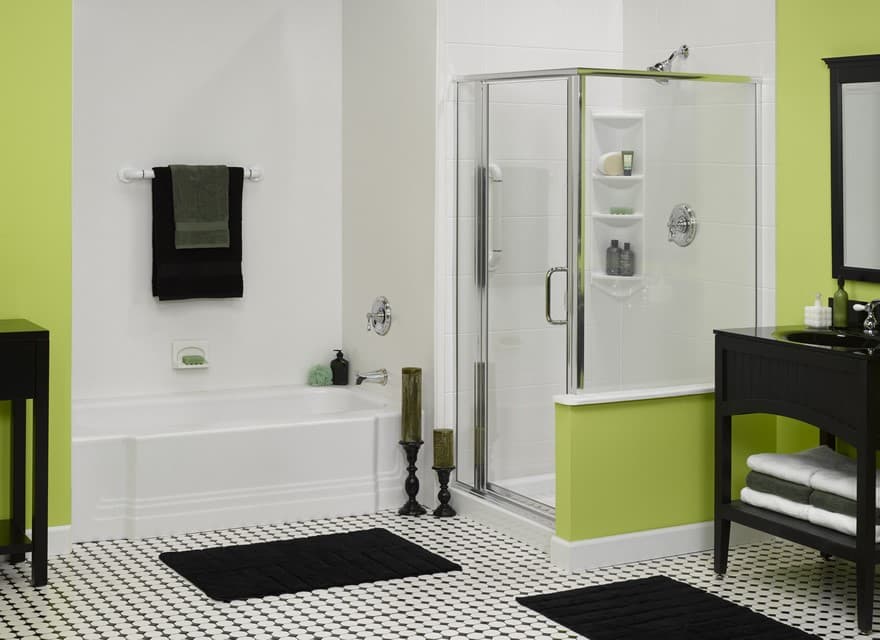
2Phase 2: Design and Material Selection
Once you decide to move forward, the next phase is specification: choosing the exact materials and finishes for your bathroom.
Panel Selection
You'll work from a product catalog that includes panel colors, patterns, and textures for shower walls and surrounds. For most homeowners, this is more enjoyable than expected. The choices are curated rather than overwhelming.
Fixtures and Hardware
Showerheads, handles, faucets, and hardware finishes are selected at this stage. Matte black, brushed nickel, chrome, and brushed gold are among the most popular options in the Seattle market.
Digital Measurements and Order Confirmation
Seattle Bath Remodels uses precise digital measurements to ensure every component is spec'd for your exact space before ordering. This eliminates the fit issues that create delays in traditional renovations.
3Phase 3: Installation Day, Hour by Hour
Arrival and Setup
The team arrives with all materials and tools. Floor coverings are placed from front door to bathroom. The lead installer does a brief walkthrough with you.
Demolition
The existing surround is carefully removed. This is the loudest phase and where unexpected conditions occasionally reveal themselves.
Substrate Preparation
The wall surface is inspected, prepared, and treated as needed. This foundation work determines the long-term performance of the installation.
Panel and Fixture Installation
New panels are measured, cut, and installed. Fixtures are installed, plumbing connections are made, and the enclosure is assembled.
Finishing and Final Checks
Seams are sealed, fixtures are tested, all surfaces are cleaned, and corridor protection is removed. Final walkthrough with homeowner.
Behind-Wall Discoveries
In Seattle, approximately 40% of bathroom surround demolitions reveal some degree of moisture damage or mold behind the walls. When this happens, work stops, photos are taken, and you are contacted immediately. No remediation work proceeds without your explicit approval.
4Phase 4: The First 24 Hours
Cure Time
Sealants used in the installation require a cure period before the shower is used. Unlike traditional tile which can require 24 to 72 hours before getting wet, our panel systems have a shorter cure time. For most projects, the shower is usable within 24 hours of completion.
What to Verify After the Team Leaves
- Run water and test the showerhead, handles, and drainage
- Examine all seam lines: clean, consistent, fully sealed
- Check frameless glass alignment from multiple angles
- Look at the floor transition: flush and properly sealed
Our Commitment
You will always be the first to know about any discoveries, before any decision is made, with photo documentation. The discovery conversation is never a pressure moment. It's an information moment. You have the full picture, and you decide what to do with it.
Frequently Asked Questions
Schedule Your Free First Consultation
The first step is a conversation. Let us assess your bathroom, answer every question in this article, and show you exactly what your remodel could look like, with no obligation to move forward.